mail_outline sales@mediastorehouse.com
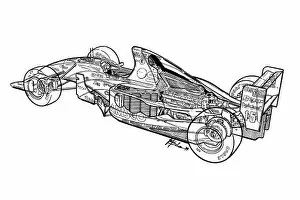
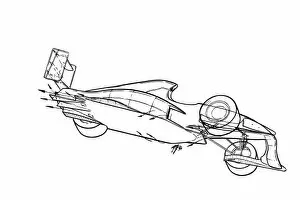
Williams FW16 1994 rear suspension detail view: MOTORSPORT IMAGES: Williams FW16 1994 rear suspension detail viewMOTORSPORT IMAGES: Williams FW16 1994 rear suspension detail view. (Illustration by Giorgio Piola/Motorsport Images)
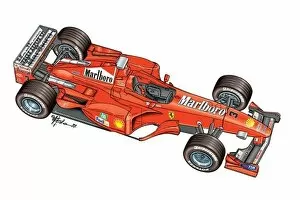
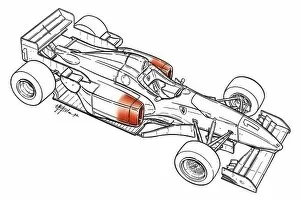
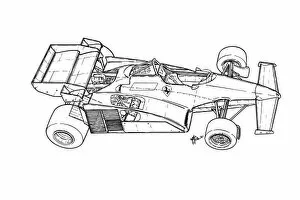
Ferrari F399 3 / 4 view: MOTORSPORT IMAGES: Ferrari F399 3 / 4 viewMOTORSPORT IMAGES: Ferrari F399 3/4 view. (Illustration by Giorgio Piola/Motorsport Images)
DUPLICATE: Williams FW26 Walrus nose: MOTORSPORT IMAGES: DUPLICATE: Williams FW26 Walrus noseMOTORSPORT IMAGES: DUPLICATE: Williams FW26 Walrus nose. (Illustration by Giorgio Piola/Motorsport Images)
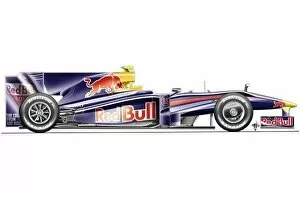
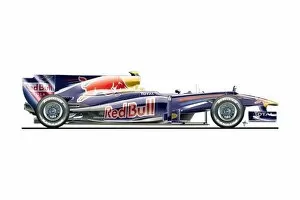
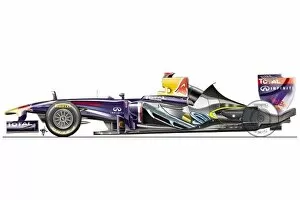
Red Bull RB5 3 / 4 view: MOTORSPORT IMAGES: Red Bull RB5 3 / 4 viewMOTORSPORT IMAGES: Red Bull RB5 3/4 view. (Illustration by Giorgio Piola/Motorsport Images)
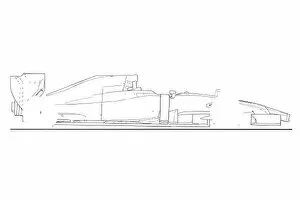
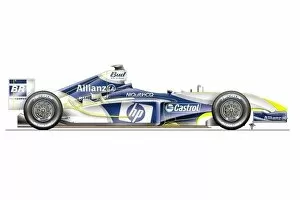
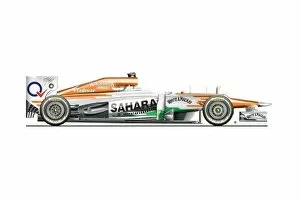
Force India VJM02 side view: MOTORSPORT IMAGES: Force India VJM02 side viewMOTORSPORT IMAGES: Force India VJM02 side view. (Illustration by Giorgio Piola/Motorsport Images)
DUPLICATE: McLaren MP4-25 top view: MOTORSPORT IMAGES: DUPLICATE: McLaren MP4-25 top viewMOTORSPORT IMAGES: DUPLICATE: McLaren MP4-25 top view. (Illustration by Giorgio Piola/Motorsport Images)
McLaren MP4-24 2009 Jerez test side view: MOTORSPORT IMAGES: McLaren MP4-24 2009 Jerez test side viewMOTORSPORT IMAGES: McLaren MP4-24 2009 Jerez test side view. (Illustration by Giorgio Piola/Motorsport Images)
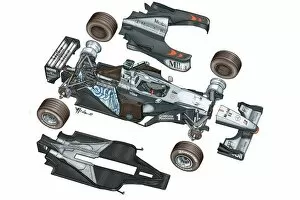
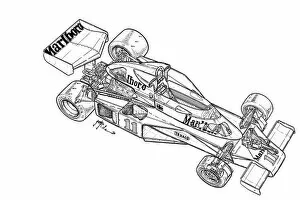
McLaren MP4-14 1999 multiple views: MOTORSPORT IMAGES: McLaren MP4-14 1999 multiple viewsMOTORSPORT IMAGES: McLaren MP4-14 1999 multiple views. (Illustration by Giorgio Piola/Motorsport Images)
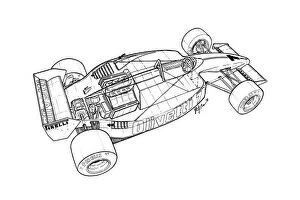
Ferrari 312T2 1976 compared with 312T: MOTORSPORT IMAGES: Ferrari 312T2 1976 compared with 312TMOTORSPORT IMAGES: Ferrari 312T2 1976 compared with 312T. (Illustration by Giorgio Piola/Motorsport Images)
Tyrrell P34 1976 six wheeler frontal comparison to 007: MOTORSPORT IMAGESMOTORSPORT IMAGES: Tyrrell P34 1976 six wheeler frontal comparison to 007. (Illustration by Giorgio Piola/Motorsport Images)
Lotus 72D 1973 side view: MOTORSPORT IMAGES: Lotus 72D 1973 side viewMOTORSPORT IMAGES: Lotus 72D 1973 side view. (Illustration by Giorgio Piola/Motorsport Images)
Lotus 49B 1968 double aerofoil overview: MOTORSPORT IMAGES: Lotus 49B 1968 double aerofoil overviewMOTORSPORT IMAGES: Lotus 49B 1968 double aerofoil overview. (Illustration by Giorgio Piola/Motorsport Images)
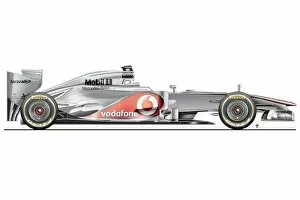
McLaren MP4-29 side view: MOTORSPORT IMAGES: McLaren MP4-29 side viewMOTORSPORT IMAGES: McLaren MP4-29 side view. (Illustration by Giorgio Piola/Motorsport Images)
Tyrrell 024 1996 Italian GP solid upper wishbone detail: MOTORSPORT IMAGESMOTORSPORT IMAGES: Tyrrell 024 1996 Italian GP solid upper wishbone detail. (Illustration by Giorgio Piola/Motorsport Images)
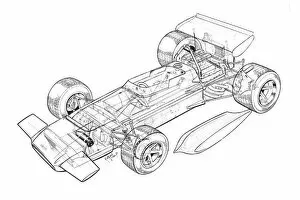
Williams FW08 1982 exploded-detail overview: MOTORSPORT IMAGES: Williams FW08 1982 exploded-detail overviewMOTORSPORT IMAGES: Williams FW08 1982 exploded-detail overview. (Illustration by Giorgio Piola/Motorsport Images)
Toleman TG184 1984 detailed overview: MOTORSPORT IMAGES: Toleman TG184 1984 detailed overviewMOTORSPORT IMAGES: Toleman TG184 1984 detailed overview. (Illustration by Giorgio Piola/Motorsport Images)
Lotus 100T 1988 detailed overview: MOTORSPORT IMAGES: Lotus 100T 1988 detailed overviewMOTORSPORT IMAGES: Lotus 100T 1988 detailed overview. (Illustration by Giorgio Piola/Motorsport Images)
Ferrari 312T4 1979: MOTORSPORT IMAGES: Ferrari 312T4 1979MOTORSPORT IMAGES: Ferrari 312T4 1979. (Illustration by Giorgio Piola/Motorsport Images)
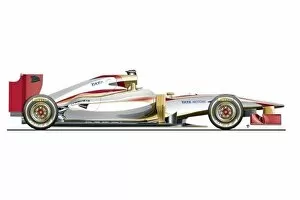
Tyrrell 019 1990 overview: MOTORSPORT IMAGES: Tyrrell 019 1990 overviewMOTORSPORT IMAGES: Tyrrell 019 1990 overview. (Illustration by Giorgio Piola/Motorsport Images)
Safety proposals for 1987: MOTORSPORT IMAGES: Safety proposals for 1987MOTORSPORT IMAGES: Safety proposals for 1987. (Illustration by Giorgio Piola/Motorsport Images)
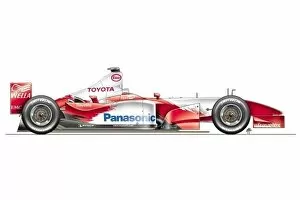
Toyota TF104B floor, detail inset: MOTORSPORT IMAGES: Toyota TF104B floor, detail insetMOTORSPORT IMAGES: Toyota TF104B floor, detail inset. (Illustration by Giorgio Piola/Motorsport Images)
DUPLICATE: BMW Sauber F1. 06 steering wheel: MOTORSPORT IMAGES: DUPLICATE: BMW Sauber F1. 06 steering wheelMOTORSPORT IMAGES: DUPLICATE: BMW Sauber F1.06 steering wheel. (Illustration by Giorgio Piola/Motorsport Images)
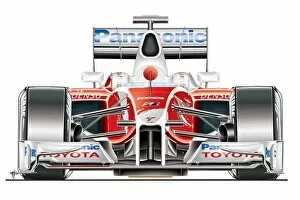
Toyota TF109 2009 Monza rear wing: MOTORSPORT IMAGES: Toyota TF109 2009 Monza rear wingMOTORSPORT IMAGES: Toyota TF109 2009 Monza rear wing. (Illustration by Giorgio Piola/Motorsport Images)
Williams FW31 2009 front wing and nose: MOTORSPORT IMAGES: Williams FW31 2009 front wing and noseMOTORSPORT IMAGES: Williams FW31 2009 front wing and nose. (Illustration by Giorgio Piola/Motorsport Images)
Red Bull RB5 2009 Abu Dhabi side view: MOTORSPORT IMAGES: Red Bull RB5 2009 Abu Dhabi side viewMOTORSPORT IMAGES: Red Bull RB5 2009 Abu Dhabi side view. (Illustration by Giorgio Piola/Motorsport Images)
Mercedes W01 side view: MOTORSPORT IMAGES: Mercedes W01 side viewMOTORSPORT IMAGES: Mercedes W01 side view. (Illustration by Giorgio Piola/Motorsport Images)
BMW Sauber C29 side view: MOTORSPORT IMAGES: BMW Sauber C29 side viewMOTORSPORT IMAGES: BMW Sauber C29 side view. (Illustration by Giorgio Piola/Motorsport Images)
Ferrari F10 with various rear wing and F-Duct configurationsMOTORSPORT IMAGES: Ferrari F10 with various rear wing and F-Duct configurations. (Illustration by Giorgio Piola/Motorsport Images)
Sauber C31 / Ferrari gearbox: MOTORSPORT IMAGES: Sauber C31 / Ferrari gearboxMOTORSPORT IMAGES: Sauber C31 / Ferrari gearbox. (Illustration by Giorgio Piola/Motorsport Images)
McLaren MP4-23 2008 side view: MOTORSPORT IMAGES: McLaren MP4-23 2008 side viewMOTORSPORT IMAGES: McLaren MP4-23 2008 side view. (Illustration by Giorgio Piola/Motorsport Images)
Williams FW26 2004 multiple nose view: MOTORSPORT IMAGES: Williams FW26 2004 multiple nose viewMOTORSPORT IMAGES: Williams FW26 2004 multiple nose view. (Illustration by Giorgio Piola/Motorsport Images)
McLaren MP4 / 26 wireframe and rendered nose: MOTORSPORT IMAGES: McLaren MP4 / 26 wireframe and rendered noseMOTORSPORT IMAGES: McLaren MP4/26 wireframe and rendered nose. (Illustration by Giorgio Piola/Motorsport Images)
Arrows A20 1999 engine and cooling packaging: MOTORSPORT IMAGES: Arrows A20 1999 engine and cooling packagingMOTORSPORT IMAGES: Arrows A20 1999 engine and cooling packaging. (Illustration by Giorgio Piola/Motorsport Images)
McLaren MP4-18 2003 side view: MOTORSPORT IMAGES: McLaren MP4-18 2003 side viewMOTORSPORT IMAGES: McLaren MP4-18 2003 side view. (Illustration by Giorgio Piola/Motorsport Images)
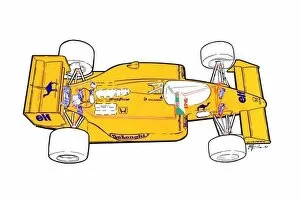
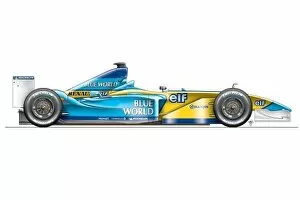
Renault R202 2002: MOTORSPORT IMAGES: Renault R202 2002MOTORSPORT IMAGES: Renault R202 2002. (Illustration by Giorgio Piola/Motorsport Images)
Mercedes W03 top view: MOTORSPORT IMAGES: Mercedes W03 top viewMOTORSPORT IMAGES: Mercedes W03 top view. (Illustration by Giorgio Piola/Motorsport Images)
DUPLICATE: McLaren MP4-27 top view: MOTORSPORT IMAGES: DUPLICATE: McLaren MP4-27 top viewMOTORSPORT IMAGES: DUPLICATE: McLaren MP4-27 top view. (Illustration by Giorgio Piola/Motorsport Images)
Marussia MR02 side view: MOTORSPORT IMAGES: Marussia MR02 side viewMOTORSPORT IMAGES: Marussia MR02 side view. (Illustration by Giorgio Piola/Motorsport Images)
Lotus E20 top view: MOTORSPORT IMAGES: Lotus E20 top viewMOTORSPORT IMAGES: Lotus E20 top view. (Illustration by Giorgio Piola/Motorsport Images)
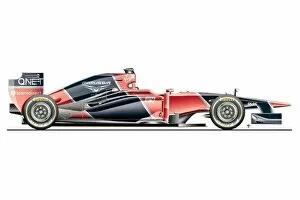
HRT F112 side view: MOTORSPORT IMAGES: HRT F112 side viewMOTORSPORT IMAGES: HRT F112 side view. (Illustration by Giorgio Piola/Motorsport Images)
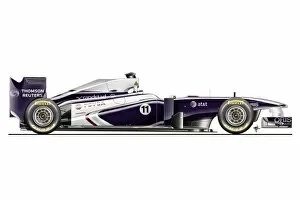
Williams FW33 side view, Abu Dhabi GP: MOTORSPORT IMAGES: Williams FW33 side view, Abu Dhabi GPMOTORSPORT IMAGES: Williams FW33 side view, Abu Dhabi GP. (Illustration by Giorgio Piola/Motorsport Images)
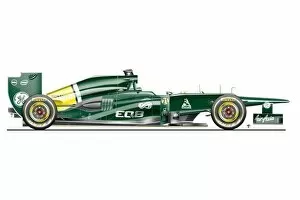
Caterham CT-01 side view: MOTORSPORT IMAGES: Caterham CT-01 side viewMOTORSPORT IMAGES: Caterham CT-01 side view. (Illustration by Giorgio Piola/Motorsport Images)
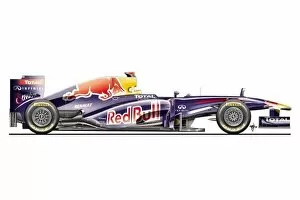
Red Bull RB7 side view, Italian GP: MOTORSPORT IMAGES: Red Bull RB7 side view, Italian GPMOTORSPORT IMAGES: Red Bull RB7 side view, Italian GP. (Illustration by Giorgio Piola/Motorsport Images)
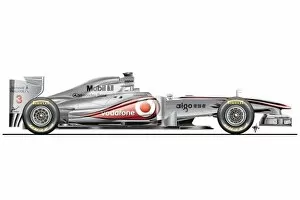
McLaren MP4 / 26 side view, German GP: MOTORSPORT IMAGES: McLaren MP4 / 26 side view, German GPMOTORSPORT IMAGES: McLaren MP4/26 side view, German GP. (Illustration by Giorgio Piola/Motorsport Images)
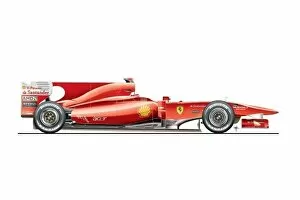
Ferrari F2012 side view: MOTORSPORT IMAGES: Ferrari F2012 side viewMOTORSPORT IMAGES: Ferrari F2012 side view. (Illustration by Giorgio Piola/Motorsport Images)
Toro Rosso brake disc mounting bells: MOTORSPORT IMAGES: Toro Rosso brake disc mounting bellsMOTORSPORT IMAGES: Toro Rosso brake disc mounting bells. (Illustration by Giorgio Piola/Motorsport Images)
Minardi M02 2000 side view: MOTORSPORT IMAGES: Minardi M02 2000 side viewMOTORSPORT IMAGES: Minardi M02 2000 side view. (Illustration by Giorgio Piola/Motorsport Images)
McLaren MP4-15 2000 British front wing: MOTORSPORT IMAGES: McLaren MP4-15 2000 British front wingMOTORSPORT IMAGES: McLaren MP4-15 2000 British front wing. (Illustration by Giorgio Piola/Motorsport Images)